To stay below Google’s looming data cap we’ve shown you how to manage your Gmail, Drive, and Photos files, how to block new uploads to Google Photos, how to clean up your Gmail inbox by quickly deleting old email, and how to upload everything you can before the restrictions hit on June 1. But what if you want to just get everything out of Google Photos to start fresh or move to another service? That’s actually a very simple task. If you only want to take out a few photos we’ll show you how to do that, as well.
Once you’ve downloaded all your photos from Google you can delete everything you have there—or just leave it as an online backup—and move to another service. If you decide to delete we’d strongly advise you to have two backups of all your photos before erasing your Google Photos library.
A good strategy is to have one backup on an external hard drive at home, and a second backup on another hard drive stashed somewhere else or with a cloud backup service that supports encryption, such as Backblaze or iDrive. Whatever you decide to do it’s always a good idea to have three copies of your important data to keep it safe. Redundancy is the key.
Download every picture from Google Photos
 IDG
IDG
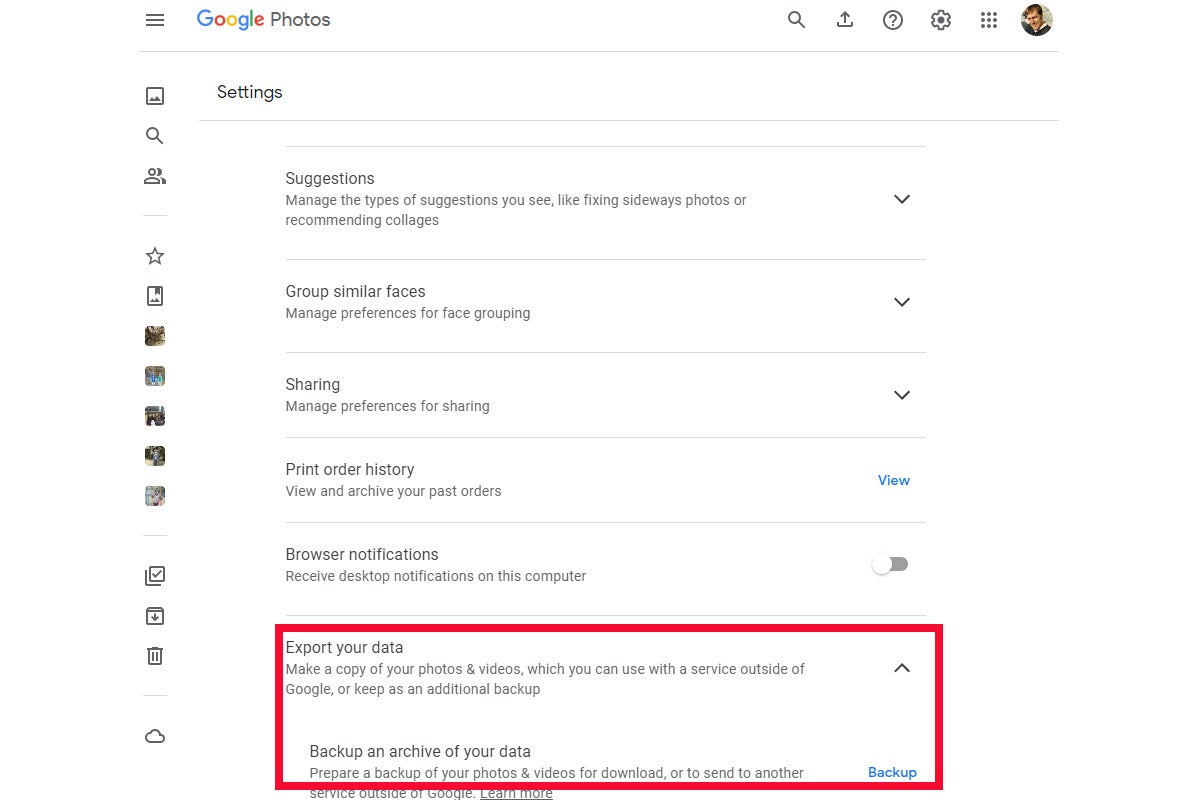
Start from the Google Photos settings to download all your images.
To get everything from Google Photos, login to the service and click the Settings cog icon in the upper-right corner. On the next screen, scroll down to Export your data, click the downward facing arrow in that section, and then click the Backup link as pictured here.
 IDG
IDG
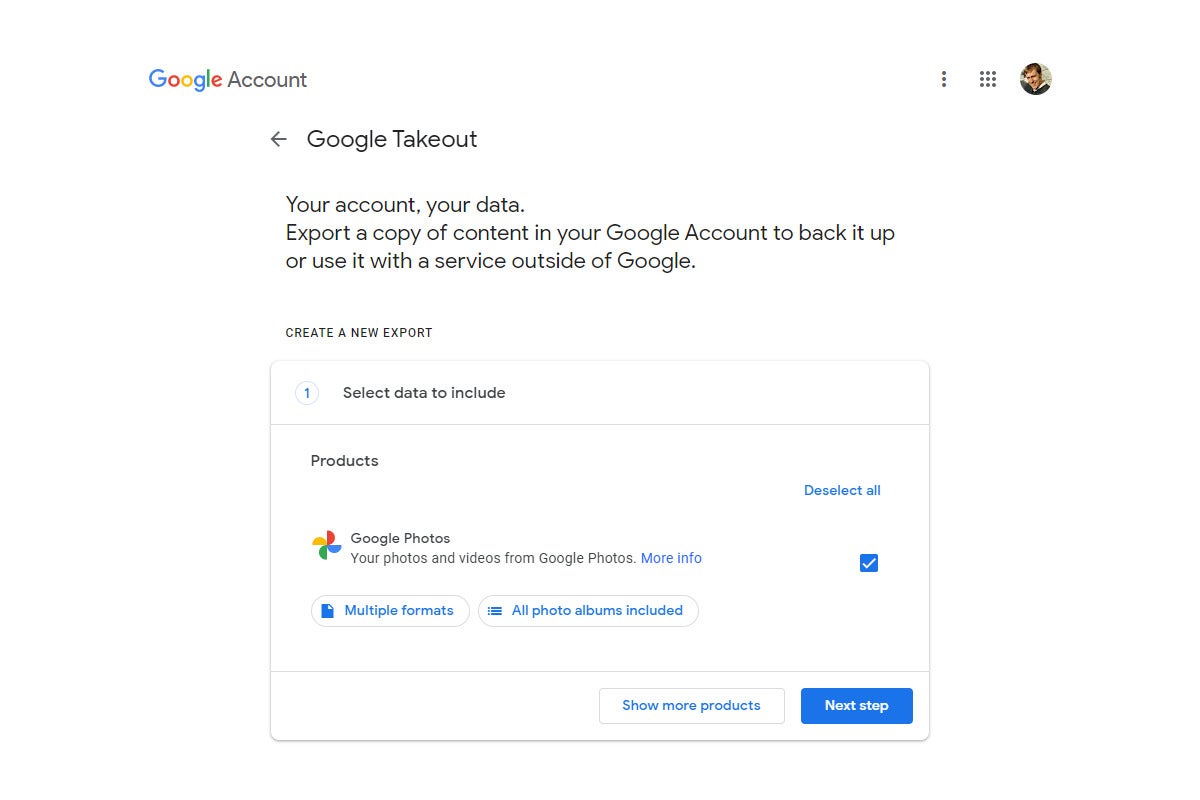
Google Takeout makes it easy to download all your Google Photos in a few clicks.
This will take you to Google Takeout, the company’s service for downloading your data stored on Google’s servers. Getting there via Photos, as opposed to going directly to Takeout, means all your stuff on Google Photos will be selected, but no other data from your Google Account will be. Now click Next step.
The next page shows the default settings for your data export, such as the file type for your archive and the size of each archive file. By default, each archive folder will be compressed into a ZIP folder, but you can also choose the TGZ format if you’d prefer. It’s also possible to make your archived ZIP files larger if you want to, though it’ll be easier to download a bunch of 2GB files as opposed to larger 10GB files that might suddenly pause or mess up.
 IDG
IDG
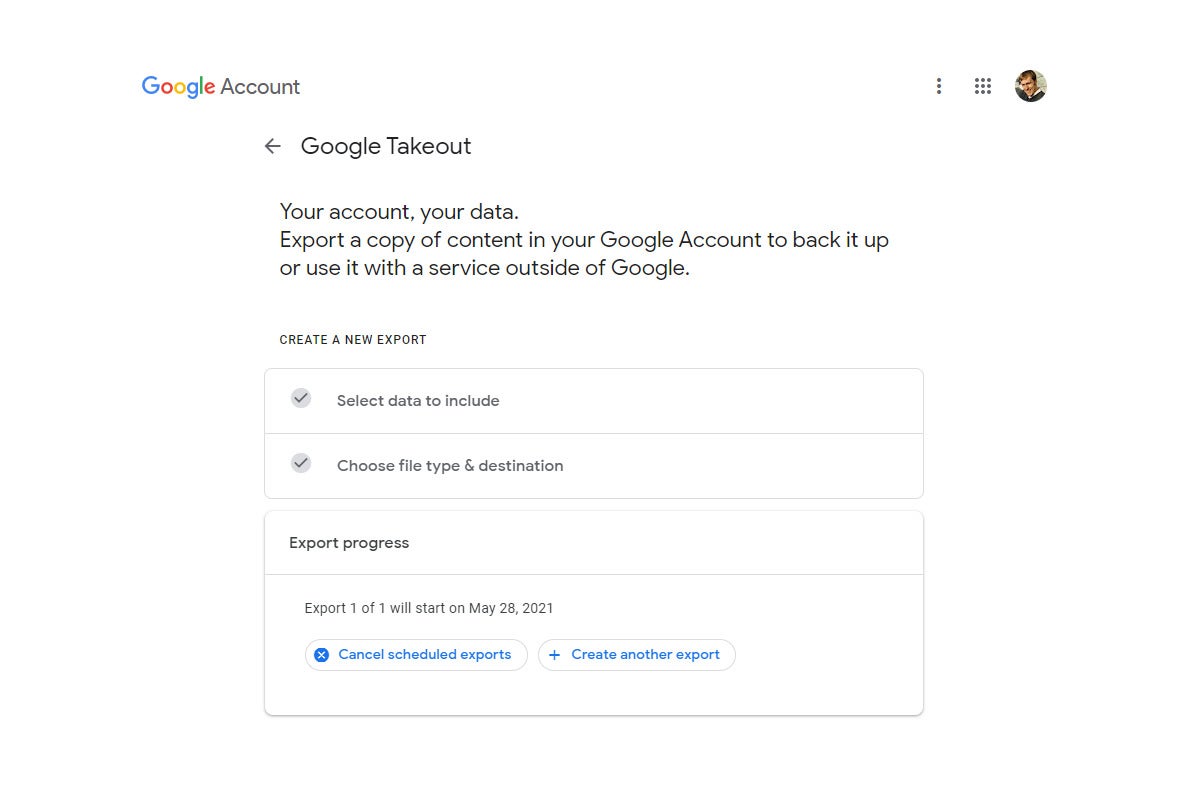
Depending on the size of your photos library your Google Photos export may take a few days.
Once you’ve got everything set the way you like, click Create export. Now all you’ve got to do is wait. Google will forecast how long the export will take. Depending on the size of your Photos collection it could be a few hours or a few days.
Download select images from Google Photos
 IDG
IDG
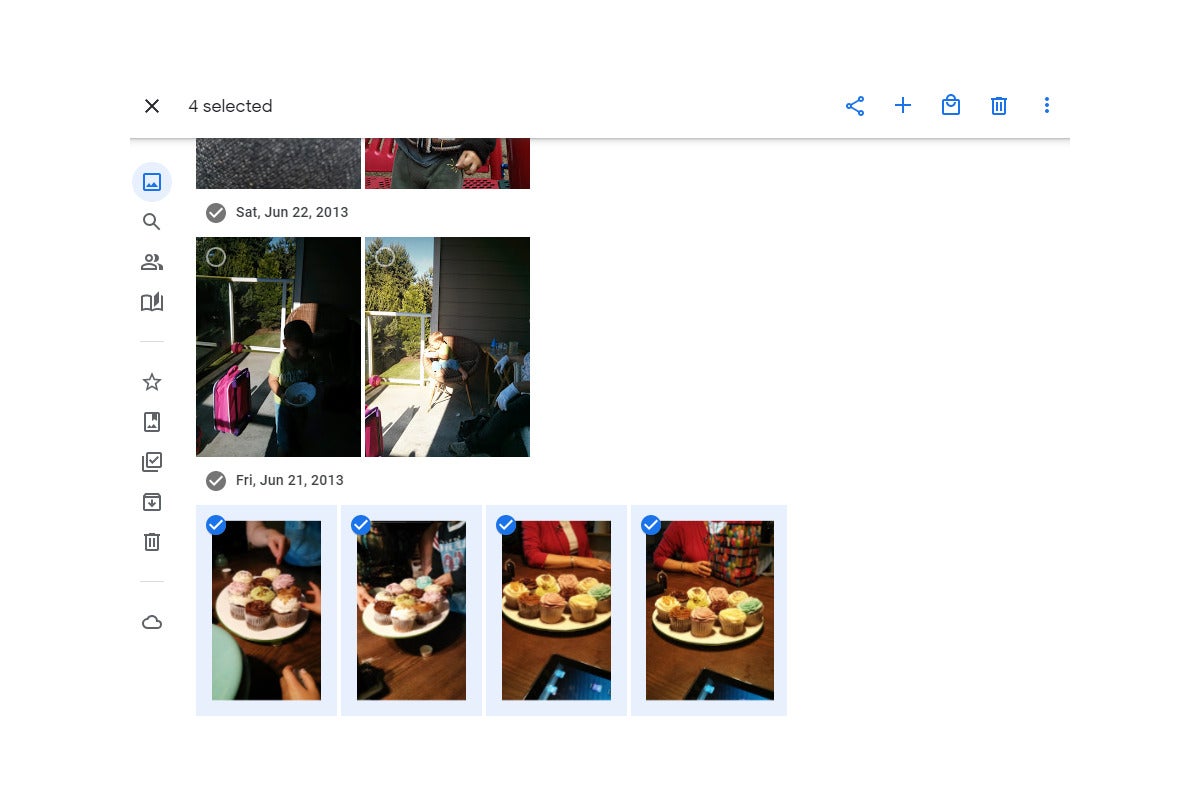
Google Photos lets you select multiple photos for download.
If you want to download only a few select photos, the process is also very simple. Begin by hovering over the photo you want to select, and then click the check mark in the upper left corner of the image. This puts Google Photos into selection mode, from there you just repeat the process for the other photos you want to download. If you’d like to download photos from an entire day just click the check mark next to the date.
 IDG
IDG
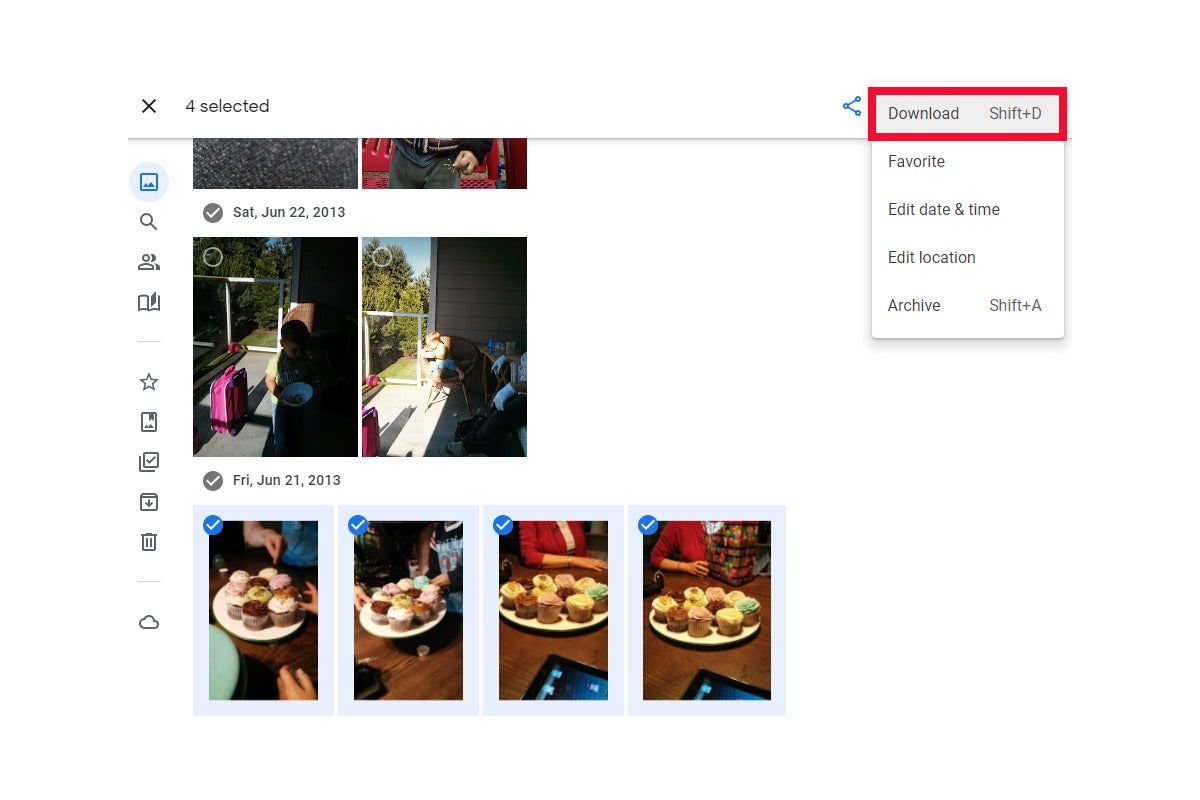
For quick jobs you can select a multiple images from your Google Photos library for download.
Once you’ve selected all the photos you want, either hit Shift + D on your keyboard or click the three vertical dots in the upper right and select Download. Next, click Save when the File Explorer window appears, and you’re all set. As with the bulk Takeout option, your photos will download as a ZIP archive.
Getting your stuff out of Google Photos is relatively easy. What’s not so simple is deleting all your photos in one go—but that’s a discussion for another time.

