It’s hard to miss how much attention AI image generators alone have attracted in recent months. With good reason, because they demonstrate the progress of deep learning models in a vivid and playful way. From chaotic random images generated with neural networks, which Google made accessible to the general public with Deep Dream in 2015, the journey went to almost photo-realistic images of the generators Dall-E 2 by Open AI, Midjourney by Midjian, or DreamStudio by Stable Diffusion.
Further reading: How to make AI art: DALL-E mini, AI Dungeon, and more
Generators are now available not only in the cloud, but also for your own PC. Provided it has enough power. This article presents image generators that use the free software Stable Diffusion, which is being developed at LMU Munich by the CompVis research group with some external partners and the company Stability AI.
Both the AI and the training data is under a comparatively permissive license: The non-profit foundation LAION (Large-Scale Artificial Intelligence Open Network) published a free database with 5.85 million images and their descriptions in 2022, on which Stable Diffusion is trained. This database is licensed under a Creative Commons license and does not contain any images itself, but it does contain the descriptions and the links to the publicly accessible image materials on the web.
Stable Diffusion on the PC
Like Dall-E and Midjourney, Stable Diffusion has a text-to-image parser. This parser processes the input using artificial intelligence, creates new motifs from image descriptions that more or less correspond to the wishes typed in. Stable Diffusion draws the material for these newly generated images from its trained models.
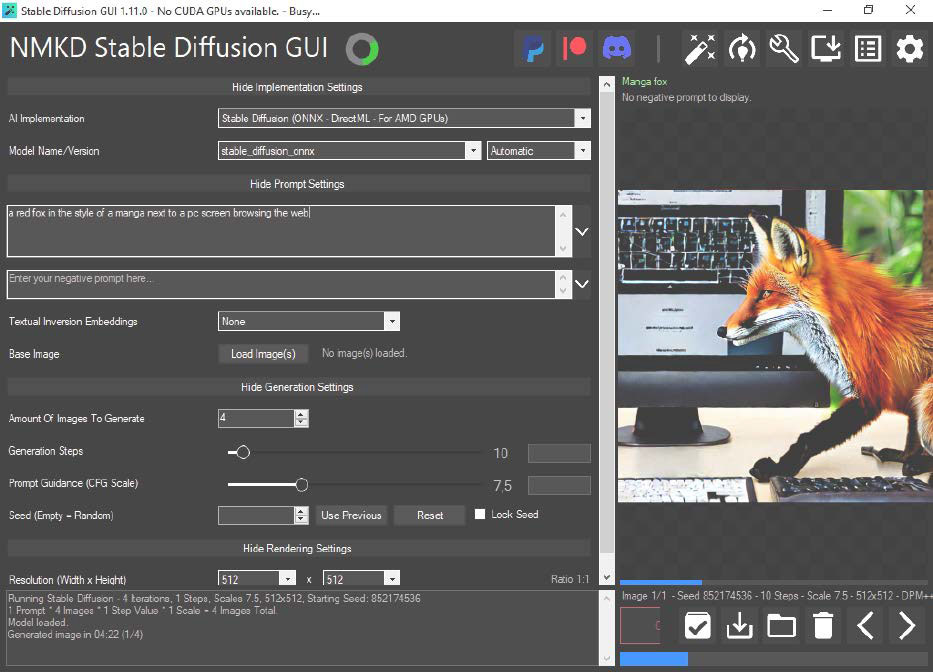
Complete package: NMKD Stable Diffusion GUI offers Windows users a comparatively simple start, because it provides an installer for all components of Stable Diffusion as an image generator.
IDG
This article shows the two programs NMKD Stable Diffusion GUI and Automatic 1111 for Stable Diffusion for Windows. Both tools have different strengths and require powerful hardware in any case: a current graphics card (Nvidia or AMD) with 8GB VRAM should already be on the PC for generative AI, as well as 16GB RAM. This equipment therefore corresponds to a well-equipped gaming PC. You can also use the tools with a weaker PC, but then you will have to wait much longer.
NMKD: A Successful Start
The team behind Stable Diffusion published the source code of its AI software for image generation as early as 2022, initially as a beta version to a smaller circle of researchers, in order to formulate a free license in the meantime. Under the terms of the Open-RAIL license, Stable Diffusion has been open to all interested parties since August 2022.
The available Python source code quickly inspired independent developers to release a locally installable version for their own computers without a cloud. The motivation behind this is greater freedom in the generation of images as well as in the motifs themselves. This is because a locally installed version of Stable Diffusion provides far more parameters for experimentation, especially for patient users.
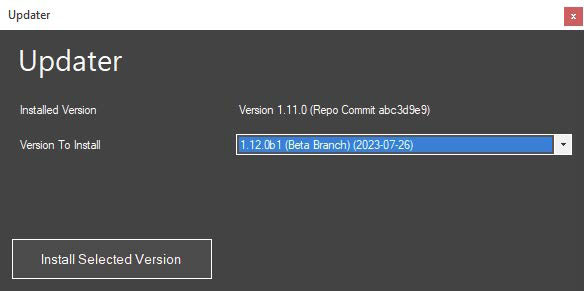
Update: Do not despair if NMKD does not produce any results at first. The built-in updater fetches new, mostly bug-fixed versions onto the computer.
IDG
Images generated with Stable Diffusion are free to use for most private and even commercial purposes. There are some detailed restrictions on use, which are addressed in the box at the end of this article.
Stable Diffusion requires Python and several Python modules. This is easier for Linux users, but on Windows systems with 64-bit, the installation of Python modules, Stable Diffusion, and the AI models is no pleasure. The free tool NMKD Stable Diffusion GUI has considerably eased this task.
The developer asks for a (voluntary) donation for the download. There are two installation packages, one with 3GB of model data and one without (1GB). In both cases a highly compressed 7z archive file is provided, which requires the compression program 7-Zip for unpacking. NMKD Stable Diffusion GUI with the finished model unpacks, by the way into any folder, to the proud size of 7.6GB on the data medium.
Models: Nvidia cards at an advantage
If you have an Nvidia graphics card with at least 4GB of video RAM in your computer and have installed the latest Nvidia drivers for the card via the Nvidia driver package Geforce Experience, you can get started right away. This is because Stable Diffusion, like many other AI applications, is optimised for Nvidia’s CUDA interface, which performs floating point calculations on the graphics card’s shaders.
After calling the program file StableDiffusionGui.EXE in the unpacked directory, the English-language graphical user interface for Stable Diffusion starts. After the welcome screen, the user is taken to the main page of the program with the settings. At the very bottom, the program shows in the display of its log whether the Nvidia card has been recognized to use the CUDA interface.
By the way, it is likely that the developer has released a new version of NMKD with quite a few improvements in the meantime. You can install the updates via the menu bar at the top right by clicking on the monitor symbol with the arrow and the sub-item Install Updates.
For AMD cards: Adapt model
The start with NMKD is a little bumpier for users with AMD graphics cards (from 6GB video RAM). This is because there are additional steps to be taken beforehand: The supplied model is not suitable for AMD due to the lack of a CUDA interface with this graphics card manufacturer. It is possible to convert the supplied model for AMD, but this way has proven to be error-prone in our tests.
It is better to download a finished model directly from the developer of NMKD (3.5GB). Again, this is an archive file in 7z format, and the folder it contains, called stable_diffusion_onnx, must this time be unpacked as a whole into the subdirectory “Models\Checkpoints” in the program folder of NMKD so that the tool can find the model.
At the top right, click on the cogwheel symbol and on the settings page on the first field called Image Generation Implementation. Here, Stable Diffusion (ONNX – DirectML – For AMDGPUs) must be selected. Below this, next to the field Stable Diffusion Model, there is the button Refresh List, and a click on it now makes the entry stable_diffusion_onnx available in the selection field in front of it. Once all this is selected, you return to the main window for image generation.
Generating images by prompt
NMKD remains comparatively clear with the functions and parameters displayed. For AI image generation, the larger input field in the Prompt Settings section is used, in which you describe the image that the AI is to generate as a motif in the result.
Below this, there is a smaller field that contains terms on which styles, motif details, or colors should not appear in the finished image.
Below this, Textual Inversion Embedding can also be used to underlay a description with example images in order to steer the AI in the desired direction.
Important, but with a strong impact on the computing time, is the Generation Steps slider, which increases the fineness of the details in the image.
The Prompt Guidance CFG Scale specifies how closely the AI should stick to the image description. The more precise and detailed this has become, the higher this value can be.
The resolution under Resolution has the greatest influence on the creation time. While a graphics card like the Nvidia Geforce RTX 4070 calculates an image of 512×512 pixels in a few seconds, high resolutions can require minutes to hours of patience.
Better pictures: Tips on syntax
If you subject NMKD Stable Diffusion GUI or Automatic 1111 to just a few experiments, you will soon realize: careful, not too terse image description is crucial.
To ensure that the results meet expectations, the images must be described quite precisely and accurately in the so-called prompt — ideally in English, which can access a larger set of model data with Stable Diffusion.
The specification of a certain image style as an additional description can help to achieve a quick sense of achievement. For example, “photorealistic” for photography-like images. Artists can also be named. For our lead picture, for example, we added “painting, in the style of Botticelli” to imitate a Renaissance painting.
Automatic 1111: AI via browser
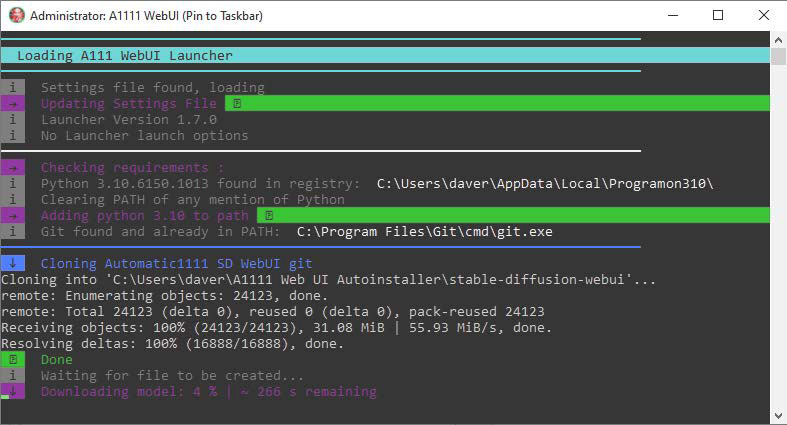
Transparent installation: Automatic 1111 is also available as a Windows installer in the form of a few Python and Powershell scripts that show what they do in a command prompt window.
IDG
In addition to NMKD, Windows users can also use Automatic 1111 as a user interface for Stable Diffusion. This program is also available with a comfortable installer, which installs Python and all modules in one action. After calling the EXE file, it first unpacks the actual installation files into the specified folder. Only then does a double click on A1111 (WebUI) start the actual installation, which takes place via script in an open prompt. Here the installation script also asks whether it should download a model. In this case, the installation process is longer, because this download again covers a whopping 3.5GB.
The similarities with NMKD end here, because Automatic 1111 is an AI image generator for advanced users. The interface is a web interface for the browser, even when used on the local computer. However, this approach has the advantage that this front-end for Stable Diffusion can also be operated from other computers in the LAN, for example from the couch with a laptop or tablet.
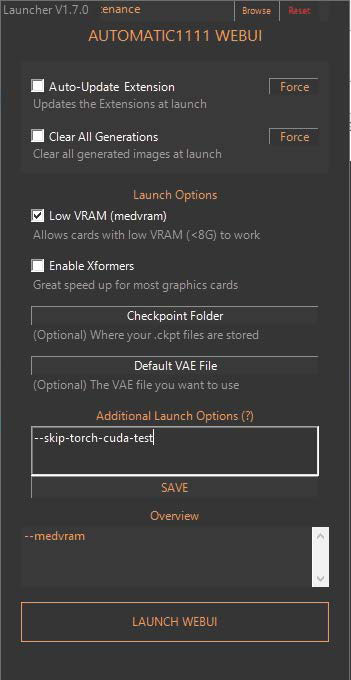
Another approach: Automatic 1111 wants to be operated via browser. To do this, this starter starts a web server that is included in the delivery and opens its address on the local host.
IDG
Calling up the link A1111 (WebUI) first displays a starter for further options. If the graphics card has less than 8GB of video RAM, the Low VRAM option here reduces the memory requirement. On the same PC that executes Automatic 1111, the URL http://0.0.0.0:7860 then opens in the browser. From outside, the address http://[IP address]:7860 is used instead for the call, where the placeholder “[IP address]” corresponds to the IPv4 number of the computer in the network, as displayed by the command ipconfig in the command prompt. You open this by entering cmd in the Windows search.
In addition, port 7860 must be allowed as an incoming port in the Windows firewall, which you set via Windows Security under Firewall & Network Protection > Advanced Settings > Incoming Rule > New Rule.
Automatic 1111 also initially only wants to work with Nvidia graphics cards. Those who use AMD must again take an intermediate step: After closing all instances of Automatic 1111, open a new window of the command prompt and enter this command:
git clone https://github.com/lshqqytiger/stable-diffusion-webui-directml && cd stablediffusion-webui-directml && git submodule init && git submodule update Afterwards, the batch file webuiuser.bat in the subdirectory “stable-diffusion- webui-directml” must be modified with a text editor. Add the following to the line “set COMMANDLINE_ARGS=”:
--opt-sub-quad-attention --lowvram --disable-nan-check --skip-torch-cuda-test After that, the call of webui-user.bat starts the web interface and installs the additionally required modules beforehand.
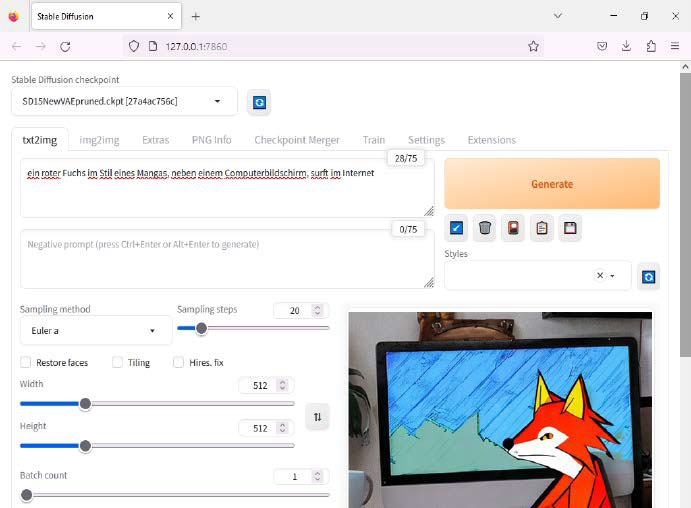
Many options for advanced users: If you want more options for fine-tuning, you will find them in Automatic 1111, for example to influence the image style with the “Sampling method”.
IDG
Stable Diffusion: The license conditions
The graphics generated by Stable Diffusion can be used in many ways with regard to the license. This is because the training data behind Stable Diffusion and the AI software itself allow the results to be used not only for private purposes. Commercial exploitation is also perfectly fine under the “Creative ML Open RAIL-M” license used.
However, it is not a traditional free license in the sense of open source software, because there are definitely restrictions. According to the license text, it is not permitted to use it to violate local law. Nor is the creation of false information with the aim of harming others allowed. Neither is the creation of discriminatory or offensive content. Medical advice, law enforcement through profiling and legal advice are also among the prohibited uses for the graphics produced by the programs presented here with Stable Diffusion.
This article was translated from German to English and originally appeared on pcwelt.de.


